To sell a physical product, a coaching service or even digital training, the essential tool to carry out this action is undoubtedly the autoresponder. Systeme io integrates the Sendgrid autoresponder into all its offers. Additionally, it allows you to create landing pages to grow your email list. We will see how to create your landing page with Systeme io ( capture form or optin ) in order to start your first sales funnel.
Start a landing page
Start by registering.
When you are on the Systeme io interface, you can, in the menu, find a “sales tunnel” tab.
When you click on it, you have a list of all the tunnels you have created. Simply click create at the top left to start creating your optin page.

You must then define the type of tunnel you want to create. This is where you will select “build your audience” and indicate a name for your conversion funnel which will aim to increase the number of subscribers to your email list for your newsletter and click on “create”.
Create a landing page
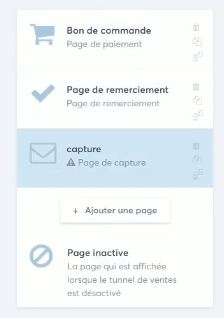
You arrive on the main page of your sales funnel to build an audience. On the left, you have two pages available for this action:

- the landing page.
- The thank you page.
When you select the landing page, you must choose from the templates offered. There are around twenty that will serve as a basis for creating your landing page. You can preview the template before selecting it.
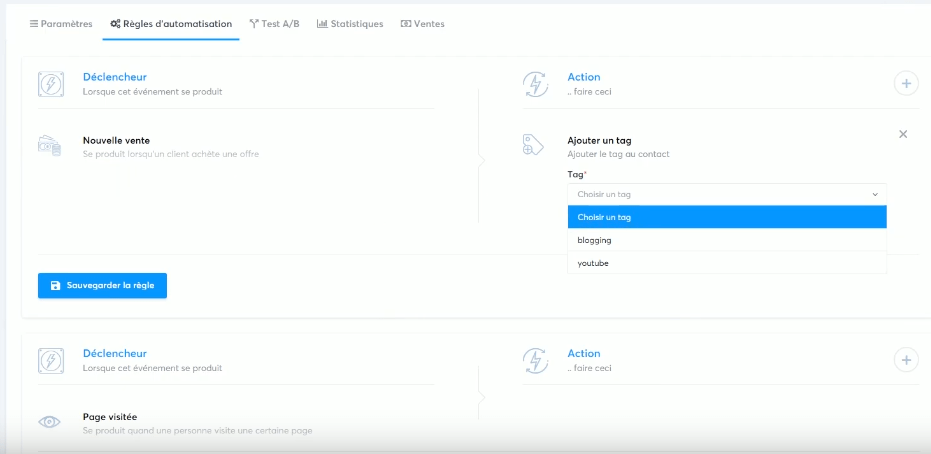
After selection, you will be able to configure and access the analyzes of your landing page. For this, you have five tabs available:
- settings.
- Automation rules.
- Test A/B.
- Statistics.
- Sales.
Settings

Once on the “settings” tab, you will see the name of your page. Below, you can copy the link which gives access to your landing page to insert it on a call to action button on your blog for example.
Each URL is made up of two parts: the base URL and the path to the page. By default it’s numbers, but you can customize your URL path.
Landing page automation rules

For your landing page, you need to define the automation rules. This corresponds to the action that must be executed when the person gives you their email address, after clicking on the call to action button.
Test A/B
If you have a Webinar or Business account, you can run A/B tests on your landing page. That is to say two versions of your page that the software will display alternately. After a certain number of visits to each page, you can determine the landing page which converts best and delete the one which does not convert enough. Just one small change to your landing page can double your subscribers. Testing your landing pages is essential.
To create your A/B test on your landing page, you must go to the relevant sales funnel, then to your landing page. Then click on “A/B test” then “create a new variation”. You then have two choices:
- duplicate : duplicate the first version and modify it.
- Create a new page : create a new version from 0.
Choose the style of form you want to create. You can use the two option buttons on the right:
- the magic wand : to modify your page.
- The eye : to see your page
You can now run your test and follow the statistics table which shows the test result.
Statistics
You have an analysis table of your data which allows you to have a quick overview of the conversions achieved with your landing pages.
The table indicates different values of your tunnel for capturing email addresses. So, you find:
- the number of pages.
- The number of registrants.
- The conversion rate.
Sale
The landing page is not used to sell a product or anything else, it only collects the visitor’s registration to your list. It therefore does not generate data regarding sales. However, it allows you to know the number of people who enter your sales funnel.
Change the appearance of the landing page

Let’s go back to our settings tab. On the right, you have an icon that represents a magic wand. Click on it if you want to edit your landing page with Systeme io’s page builder.
Note: You can also duplicate your page or preview it.
The page builder is made up of blocks into which you can insert elements using drag and drop. It is very easy to use and allows you to personalize your landing page according to the theme of your activity.
Form fields
The minimum data you need is the email address. However, it is possible to collect other information in your form:
- would
- Intracommunity VAT number.
- Company name.
- Address.
- First name.
- Phone number.
- Surname.
- Code postal.
- The country.
After registering on the landing page
The visitor has given his email address, you must modify the second page of your tunnel which corresponds to the thank you page. This page can be replaced directly by a sales page depending on your objective.
These pages are also modified using the builder.
Create a pop-up
In your sales funnel, you can insert a pop-up rather than a landing page. This allows you to have a pop-up window which will offer subscription to the newsletter.
This is the most effective method to have more subscriptions to your email list on a site or blog.
HTML code is available for integrating the pop-up into your WordPress site. If you prefer to insert a form, the steps will be identical, this will also involve inserting a code on your blog.
