Are you looking for a quick and inexpensive way to create a profitable blog with Systeme io ? This option is integrated into Systeme io regardless of your subscription. We will see the different steps to create a blog that makes money.
- Why a blog function on Systeme io?
- The disadvantages of WordPress
- Create a profitable blog with Système io
- Create a blog that makes money
- How to create a blog with Systeme io
- The option menu for your blog
- Edit your blog
- Create a blog post
- The option menu for your article
- Create a page for your blog
- Create a profitable blog with the page and article builder (builder)
- Edit the blog and articles template
- Create a blog that makes money
- Opinion on creating a blog with Systeme io
Why a blog function on Systeme io?
Initially, Aurélien Amacker wanted to use WordPress for his SAAS software. However, he quickly realized that WordPress was not the easiest solution for users.
The disadvantages of WordPress

Creating a customizable blog on WordPress requires several things:
- buy a domain name.
- Take accommodation.
- Installer WordPress.
- Install a theme.
- Configure your theme.
- Make WordPress settings.
- Install plugins.
- Adjust plugins.
In short, a lot of steps that are not always easy to implement and can take a whole day to create.
Create a profitable blog with Système io
The primary use of Systeme io is to create sales funnels to earn money, but you also have a function that allows you to create your blog on Systeme io for free.
This brings several advantages:
- No need for hosting for the blog.
- No need to install plugins.
- A fully customizable basic template.
- No programming required.
- Possibility of creating several blogs.
- Blog optimized for Google SEO.
- Copy your blog in one click.
For SEO, Aurélien called on an Englishman, a great SEO professional whom he has been following since 2010 as an entrepreneur. He takes care of providing strategies and optimizing the structure of the blog for SEO.
Create a blog that makes money

To start your blog , you must go to the “Blog” tab located on the top menu. You arrive on a page which presents the different blogs that you have created. Initially, this list is empty.
How to create a blog with Systeme io

The first thing to do is to register on Systeme io. For this, you can use it for free.
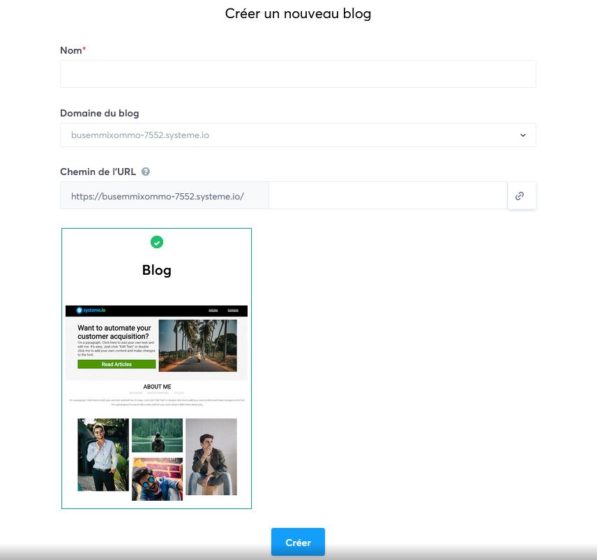
Then click on the “Create Blog” button to start your blogging site. As you can see, the first creation page consists of four pieces of information to provide:
- the name of your blog : choose the name of your choice.
- The domain name of the blog : you can indicate a domain name that belongs to you. This option is available for packages.
- The URL path of the page : choose the URL address of your blog.
- The template : only one choice available which serves as a basis for creating the blog.
Once created, you again land on the blog list where you can see the newly created blog.
The option menu for your blog

To the right of the name, you have several options available:
- view the blog : you can have an overview of the blog.
- Blog setting : to modify the blog information (name, domain name or URL).
- Duplicate Blog : Very useful if you do a lot of blogging.
- Share the blog : this allows you to give the blog to a client for example.
Edit your blog
To begin editing your blog, simply click on the name of your blog.
Create a blog post
To add your first blog post, click on the “create blog post” button on the right.

We then ask you several things:
- a title : the title of your article.
- A short description : a short summary of the content of your article.
- The access path : indicate the keyword of your article separated by the minus sign. Like “sales funnel” for example.
- Image : here select the image that will appear on the article list page and which corresponds to the content of your article.
You then arrive at the list of blog articles.
The option menu for your article
As with the blog, you have different options available on the right of the article name. So, you can do several types of actions on the blog article:
- view the article : you have a preview of the article.
- Duplicate item.
- Edit the post setting (name, URL, and description).
- Publish the article : when saving your article, it is saved as a draft. You must activate the publication to make it visible on your blog and index it in search engines.
- Edit article.
- Delete article.
Create a page for your blog

When you click on the “create page” option, you have 3 pages already created. So, you find the following three pages:
- home page.
- The page that lists the articles.
- A contact page.
Of course, you can create your own pages. The options available for pages are the same as for your articles.
Create a profitable blog with the page and article builder (builder)

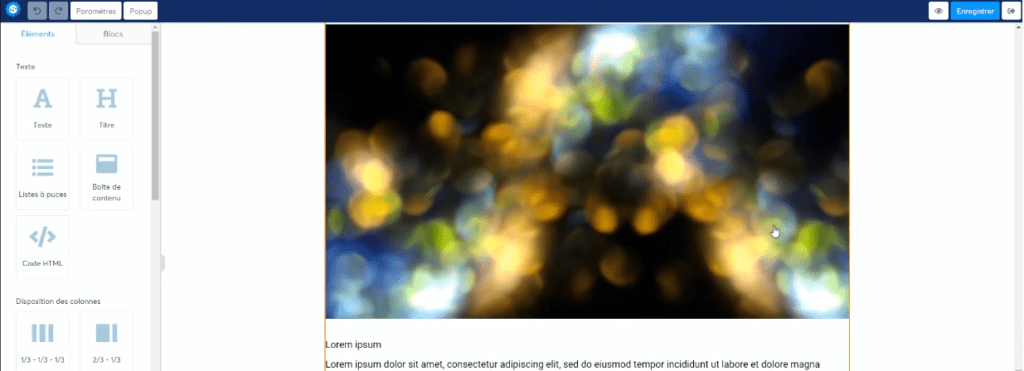
The page builder is identical to that used to create sales funnels. You have a series of elements that you can insert into your page using drag and drop.
Then, you can change the properties of each element with a multitude of settings that allow you to adapt your page or article to the design of your blog.
You can edit each element or block directly on the page. This way, you have a direct view of the page or article on the screen.
Edit the blog and articles template
Once you have created and written the content of your articles and pages, you can change the templates to adapt them to your blog.
A template represents the design that will surround your text. It includes the menu, footer, sidebars and all the elements you want to add to it.
The article template is constructed in this way:
- your text.
- A part about the editor.
- Comments.
The blog template is composed of:
- a top menu for navigation and blog name.
- a text box defined by the content you created.
- A page footer with share buttons for social networks.
You can modify the different elements or blocks with the Systeme io page builder quickly.
Create a blog that makes money
To optimize and create a profitable blog, you must consider integrating a form for capturing emails in order to create a list of subscribers to your newsletter.
The advantage with Systeme io is that you have everything at your fingertips. So, you will create a small product that you will offer in exchange for the email address. This is what we call a lead magnet or prospect magnet.
People will be able to subscribe to your email list using a form on each of your pages or via a pop-up that you can easily insert on your blog.
This option is, in fact, available on each of your blog pages. Once the person has subscribed to your email list, you will be able to create an automatic email sequence with Systeme io via the autoresponder or by creating newsletters and campaigns.
This way you can communicate with your subscribers to offer them your products and services.
Opinion on creating a blog with Systeme io

This option allows you to create a quickly available site. It’s very useful when you want to present an activity or a product without having to worry about hosting the blog.
It must still be admitted that this is not the ideal solution if you want an elaborate blog.
The functionalities are much more reduced than with a CMS like WordPress.
This is why I recommend this solution if you don’t have a blog and you want a showcase.
For professional use, prefer a solution like WordPress with dedicated hosting.
